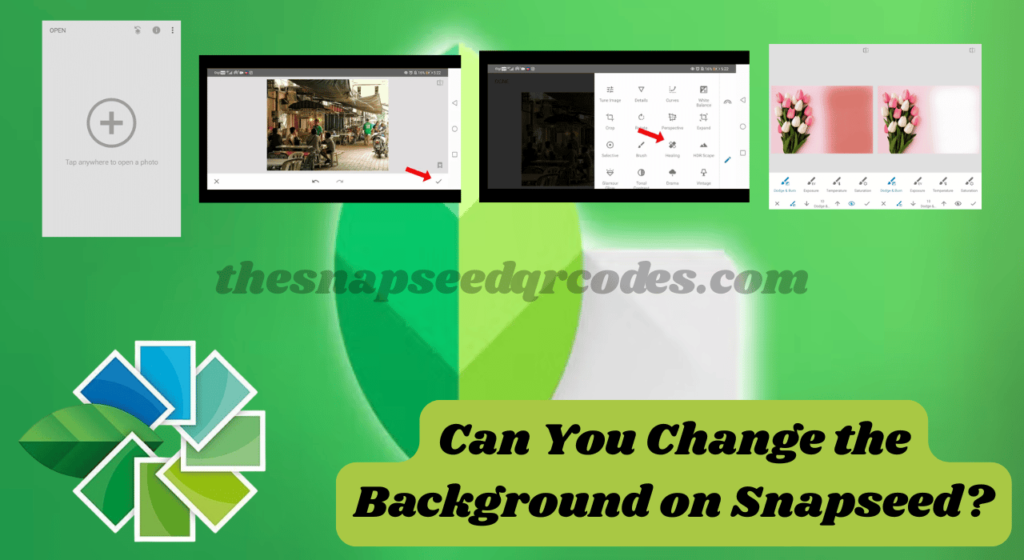
Can You Change the Background on Snapseed?
Snapseed is one of the most powerful and accessible photo editing apps available, widely used by both amateurs and professionals. With its comprehensive set of tools, it offers the ability to enhance photos, adjust color, contrast, and even apply special effects. But one question that often arises among users is, “Can you change the background on Snapseed?”
While Snapseed offers impressive features for editing your photos, it’s essential to clarify that Snapseed does not offer a direct “background replacement” tool, like some desktop editing software (e.g., Photoshop). However, with a bit of creativity and clever use of Snapseed’s tools, it is indeed possible to achieve a background change effect.
Whether you’re looking to blur the background, enhance the background colors, or add a different tone, Snapseed offers various ways to modify the appearance of your background.
In this article, we’ll explore how you can work with backgrounds on Snapseed, provide expert tips on editing backgrounds, and guide you step-by-step through the process of transforming your photos. Whether you’re using Snapseed for portrait photography, landscape shots, or even selfies, this guide will help you get the most out of your Snapseed background editing experience.
Understanding Snapseed’s Background Editing Capabilities
Snapseed is widely regarded for its user-friendly interface and versatile tools. While it might not have a one-click background replacement feature like other more advanced software, Snapseed allows users to make significant adjustments to the background of a photo in several ways. Here are some of the features you can use:
1. Lens Blur for Background Focus
One of the easiest and most effective ways to change the background in Snapseed is by using the Lens Blur tool. This feature allows you to apply a blurred effect to the background while keeping the subject in sharp focus, mimicking the bokeh effect seen in professional portraits.
You can adjust the shape, intensity, and transition of the blur, so it’s a great tool for giving your images that depth-of-field look where the subject stands out from the background.
- How to Use Lens Blur:
- Open your photo in Snapseed.
- Navigate to the Tools section and select Lens Blur.
- Use your finger to select the area of the image you want to keep sharp (typically the subject).
- Adjust the intensity of the blur to soften the background and add depth.
- Save your changes and export your photo.
This tool is perfect for portraits, nature shots, or any photo where you want to keep the focus on the subject while making the background less prominent.
2. Use the Selective Tool for Targeted Background Adjustments
Another option for editing the background is Snapseed’s Selective Tool. This tool allows you to apply edits only to specific areas of your photo. While it doesn’t change the background entirely, it lets you adjust elements of the background, such as color, brightness, and contrast.
For instance, if you want to make the background brighter or change its tone, the Selective Tool can help.
- How to Use the Selective Tool:
- Open the photo in Snapseed and go to the Tools menu.
- Select Selective from the list.
- Tap on the area of the background you want to adjust.
- Adjust the sliders for Brightness, Contrast, Saturation, or Structure depending on your desired effect.
- Move the selected area or add more points to adjust different parts of the background.
The Selective Tool is great when you want to enhance or adjust the background without altering the main subject of the image.
3. Color Grading for Background Enhancement
For a more subtle background change, Color Grading is a powerful feature within Snapseed. It allows you to adjust the tones and color balance of your photo, making it easy to give the background a fresh feel. You can manipulate the shadows, midtones, and highlights to create a different mood for your background.
- How to Use Color Grading:
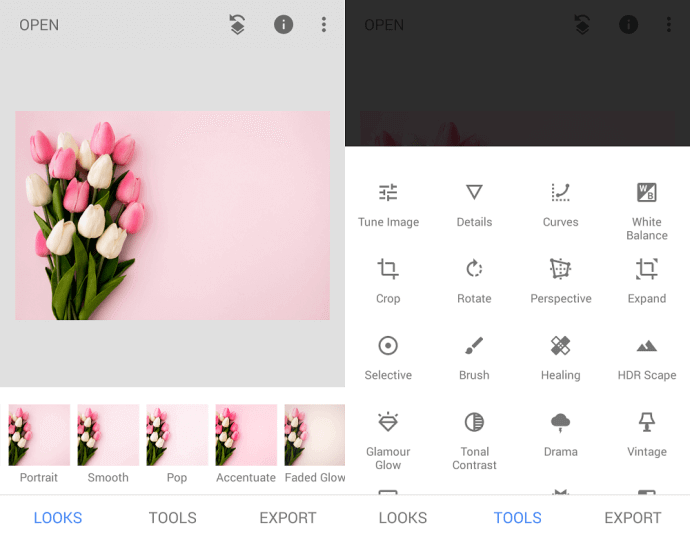
- Open the photo in Snapseed and tap on Tools.
- Choose Tune Image, which lets you adjust the photo’s overall color balance.
- Play with the Warmth, Saturation, and Ambiance sliders to create a tone that complements your photo’s subject.
- Alternatively, use Curves for more advanced color adjustments, allowing you to modify the brightness and color balance of specific areas of the image.
This feature is excellent when you want to transform the background’s mood, turning a dull or distracting background into one that’s more in harmony with your subject.
4. Adding Textures and Filters to Backgrounds
Snapseed also allows you to add textures and filters to your background, giving your photos a creative flair. You can use textures to create a specific pattern or artistic effect in the background, or apply filters to change the entire aesthetic of your photo.
For example, the Grainy Film filter can give your background a vintage look, while the Glamour Glow effect can soften the entire photo, including the background.
- How to Add Textures and Filters:
- Open the photo in Snapseed.
- Go to Tools and select Filters.
- Choose from a range of filters, including Drama, Vintage, and Lens Blur.
- Experiment with the intensity of the filter to get the desired effect on the background.
Adding textures or filters is perfect for when you want to give your photo a completely new vibe without needing to change the background entirely.
Read Also: Which is Better, Snapseed or Lightroom?
Step-by-Step Guide to Changing the Background in Snapseed
While Snapseed doesn’t allow you to completely replace the background, you can follow this simple step-by-step process to adjust or enhance the background in your photo:
1. Open the Photo
- Start by opening the photo in Snapseed that you want to edit.
2. Apply the Lens Blur for Background Focus
- Go to Tools and select Lens Blur.
- Choose the area of the photo you want to keep sharp (typically the subject).
- Adjust the intensity of the blur to soften the background.
3. Adjust the Background Using the Selective Tool
- Select Selective from the Tools menu.
- Tap on the area of the background you want to adjust.
- Play with the Brightness or Contrast to make the background stand out more or blend in better with the subject.
4. Apply Color Grading to Enhance the Background
- Choose Tune Image from Tools to adjust the Warmth, Saturation, and Ambiance of the photo.
- This step will help create a balanced tone between the background and subject.
5. Use Filters and Textures
- If you want a more dramatic background effect, use Filters or Textures from the Tools menu.
- Choose the filter or texture that fits the mood you’re aiming for in your photo.
6. Save Your Edited Photo
- Once you’re satisfied with the background changes, save your photo and export it.
Can Snapseed Replace the Background?
While Snapseed doesn’t allow you to replace the background in a traditional sense like desktop editing software (e.g., Photoshop), it offers powerful tools for modifying and enhancing your background. Through tools like Lens Blur, Selective, and Color Grading, Snapseed enables users to create the illusion of a different background or elevate the current one, all while maintaining a professional look.
For more advanced background replacement, you may need to explore other apps that specialize in background editing. However, for most users looking to enhance their photos with subtle yet impactful background changes, Snapseed is more than enough.
How to Remove the Background in Snapseed (Step-by-Step Guide)?
Step 1: Install Snapseed
Before diving into editing, you need to install Snapseed from the Google Play Store (for Android devices) or the Apple App Store (for iOS). Once the app is installed, you’re ready to start editing.
Step 2: Upload the Image
- Open Snapseed on your smartphone and click on the “+” icon located at the center of the screen.
- Select the image you want to edit from your gallery. Snapseed supports various formats, including HD 4K, 8K, and 16K, making it a great tool for editing high-resolution photos.

Step 3: Select the Brush Tool
- Once your image is uploaded, tap on the Tools section and select the Brush Tool. The Brush Tool will allow you to make precise edits to specific areas of the photo, including background adjustments.
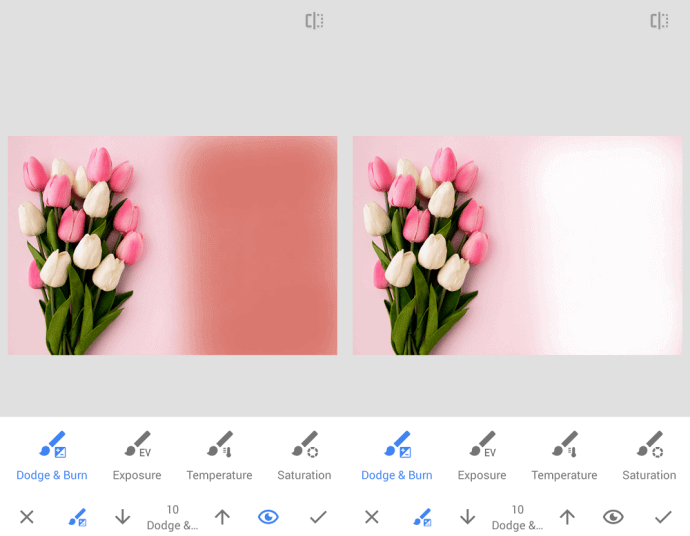
- Now, choose the Dodge and Burn option. The Dodge tool helps lighten areas, and the Burn tool darkens them. Both tools can be used to gradually erase or adjust the background.
Step 4: Use Dodge and Burn for Background Removal
- Set the intensity of the brush to your liking. For a smoother effect, set the intensity to -10 or +10. The higher the intensity, the clearer the effect will be.
- Begin brushing over the background areas you want to remove or modify. You can use the Dodge Tool to lighten parts of the background or the Burn Tool to darken areas. Continue applying the tool until you’ve removed the unwanted background.
Step 5: Save the Edited Image
Once you’re satisfied with the background adjustments, click the checkmark at the bottom to save your changes. Finally, export the file to your smartphone or share it directly to social media.
How to Remove Background Objects in Snapseed?
Sometimes, it’s not just the entire background you want to remove, but specific objects. Snapseed’s Healing Tool allows you to easily remove unwanted items from your photos, whether they’re tiny objects or large distractions.
Step 1: Upload the Image
- As before, launch Snapseed and upload the image by clicking on the “+” icon.
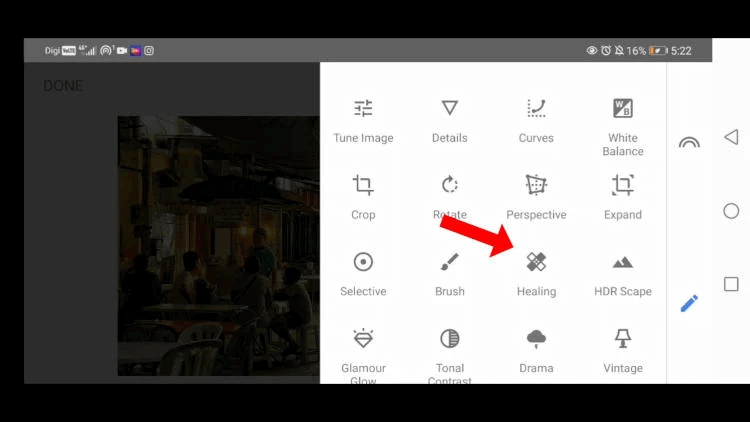
Step 2: Select the Healing Tool
- Once your image is loaded, navigate to the Tools section and tap on the Healing Tool. This tool has the icon of a bandage and is used to remove small or large objects from your image.
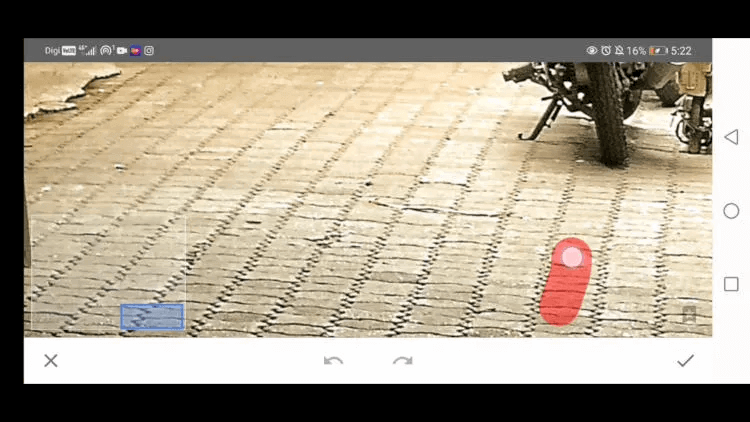
Step 3: Mark the Object You Want to Remove
- Zoom in on the photo and select the object you wish to remove. For example, if you’re removing a piece of trash from a street photo, zoom in on the area where the object is located.
- Use your finger to mark the object you want to remove. Once you lift your finger, Snapseed will automatically fill in the marked area with the surrounding pixels, effectively removing the unwanted object.

Step 4: Save and Export the Edited Image
- After you’ve successfully removed the object(s), click the checkmark to save your changes and then export the image to your smartphone.
How to Remove the Background and Make It Black in Snapseed?
If you’re looking to create a dramatic effect by changing the background to black, Snapseed’s Selective Tool and Healing Tool can help you achieve this with ease.
Step 1: Upload the Image
- Open Snapseed and click on the “+” icon to upload the photo you want to edit.
Step 2: Use the Healing Tool to Remove Unwanted Details
- First, use the Healing Tool to remove any small details or distractions from the background.
- Select the parts of the image that need smoothing or elimination, like bright spots or minor elements, and apply the healing tool to seamlessly blend them out of the photo.
Step 3: Choose the Selective Tool
- After the background is cleared of unwanted details, navigate to the Tools menu and select the Selective Tool. This tool lets you make adjustments to specific areas of the image.
- You can now increase or decrease the intensity of the background’s focus and adjust the area that you want to darken.
Step 4: Lower the Brightness to Make the Background Black
- Now, you need to adjust the Brightness of the background. Use the Brightness slider in the Selective Tool to decrease the overall brightness of the background.
- Lower the brightness until the background turns black or as dark as you prefer.
Step 5: Save the Edited Image
- Once you’re satisfied with the changes, click the checkmark to save the edited image and export it to your smartphone.
Conclusion: Elevate Your Photos with Background Edits in Snapseed
While Snapseed doesn’t offer direct background replacement tools, it provides an array of features that allow you to adjust, enhance, and transform the background of your photos in creative ways. Whether you want to blur the background for a portrait, add a cinematic effect, or adjust the colors to match the subject, Snapseed offers the flexibility to make your images look professional and polished.
By using tools like Lens Blur, Selective, and Color Grading, you can enhance the background to better complement the subject and create stunning visuals. With Snapseed’s user-friendly interface and high-quality results, it remains a go-to app for many photo enthusiasts looking to enhance their photos on the go.
So, next time you wonder, “Can I change the background on Snapseed?”, rest assured that with a bit of creativity and the right tools, Snapseed offers all the features you need to take your photos to the next level.
See Also More QR Codes:
- Cinematic Vibes Snapseed QR Codes
- Cool Tones Snapseed QR Codes
- Urban Grit Snapseed QR Codes
- Golden Hour Glow Snapseed QR Codes
- Pastel Dream Snapseed QR Codes
- Bright & Vibrant Snapseed QR Codes Free Download
- Moody Black and White Snapseed QR Codes
- Aesthetic Film Snapseed QR Codes
- Vintage Film Look Snapseed QR Codes
- 30+ Portrait Snapseed QR Codes Free
- Snapseed QR Codes Face Smooth – 4k/8k HD Presets

- Snapseed QR Code Blue and Brown - May 20, 2025
- Is Snapseed Good for Photo Editing? - May 2, 2025
- What are the Benefits of Using Snapseed QR Codes? - April 28, 2025